It's actually not as hard as it seems
A bootable USB drive is the best approach to clean installing Windows 11. But setting up a flash drive with the required files, let alone using it to boot into a computer and set up Microsoft’s latest operating system from scratch, can feel daunting. Luckily, the procedure isn’t as hard as it seems.
The instructions below will walk you through everything you want to know about installing Windows 11 using a bootable USB drive.
How To Create a Bootable Windows 11 USB Drive
It’s possible to create a bootable Windows 11 USB drive using Microsoft’s Media Creation Tool. It handles everything from formatting the USB drive with the correct format to downloading and setting up the files required to boot into the Windows 11 Setup.
But before you start, here’s what you need:
- A USB stick with at least 8 gigabytes of storage space. You’ll lose all data on the flash drive, so create a backup of anything inside before you go ahead.
- A PC running Windows 8, 8.1, 10, or 11.
- An internet connection capable of downloading 5-6 gigabytes of data.
1. Head over to the Download Windows 11 page on Microsoft. Then, scroll down to the Create Windows 11 Installation Media section and select Download Now to get the Media Creation Tool.
2. Run the downloaded MediaCreationToolW11.exe file to launch the Media Creation Tool. You don’t have to install it, but you need to provide administrative privileges.
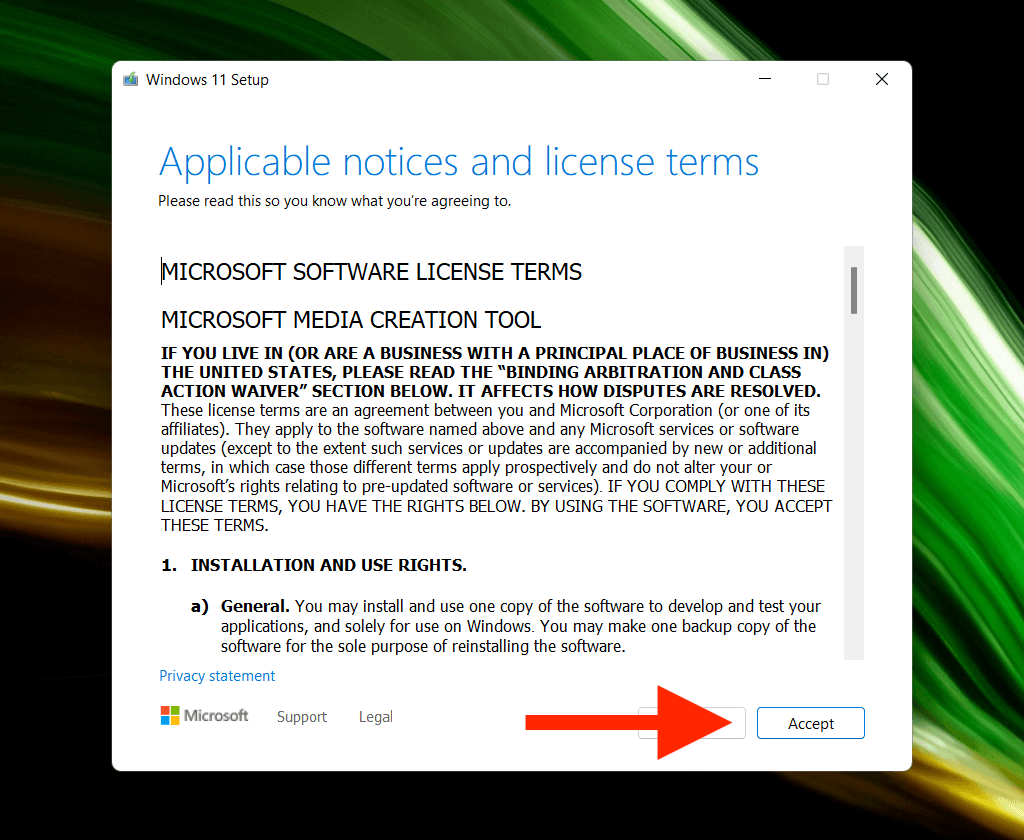
3. Select Accept to agree to Microsoft’s software license terms.
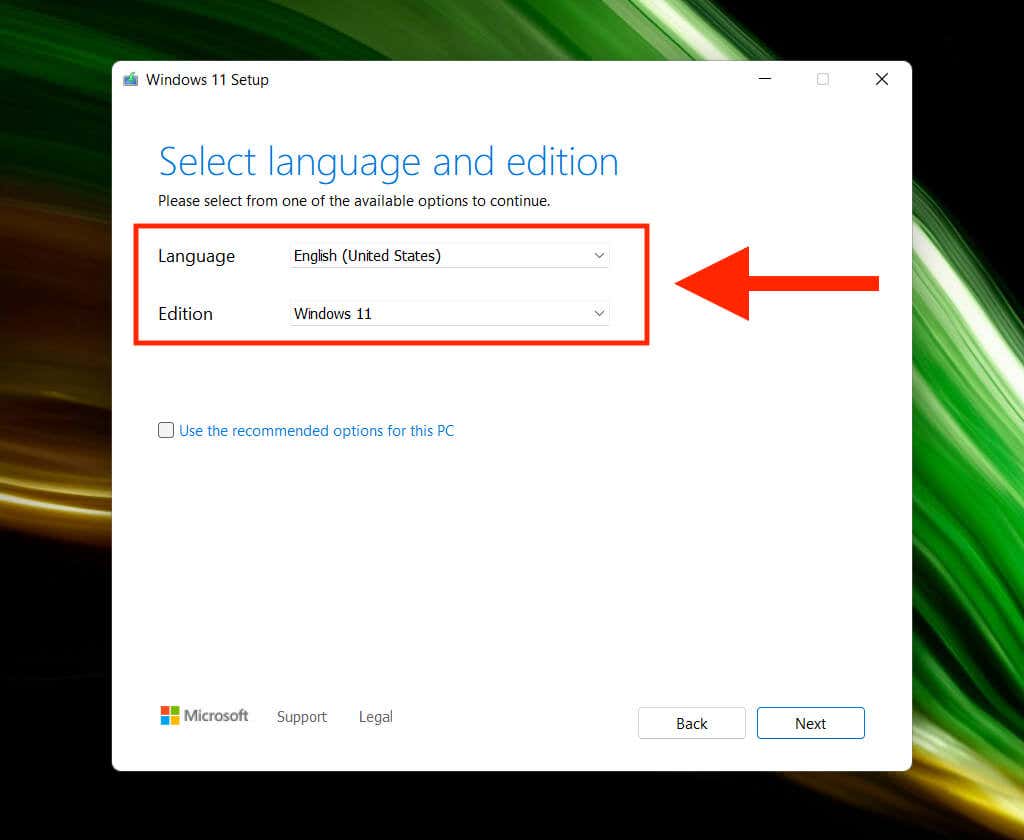
4. Specify the Language (e.g., United States) and Edition (Windows 11).
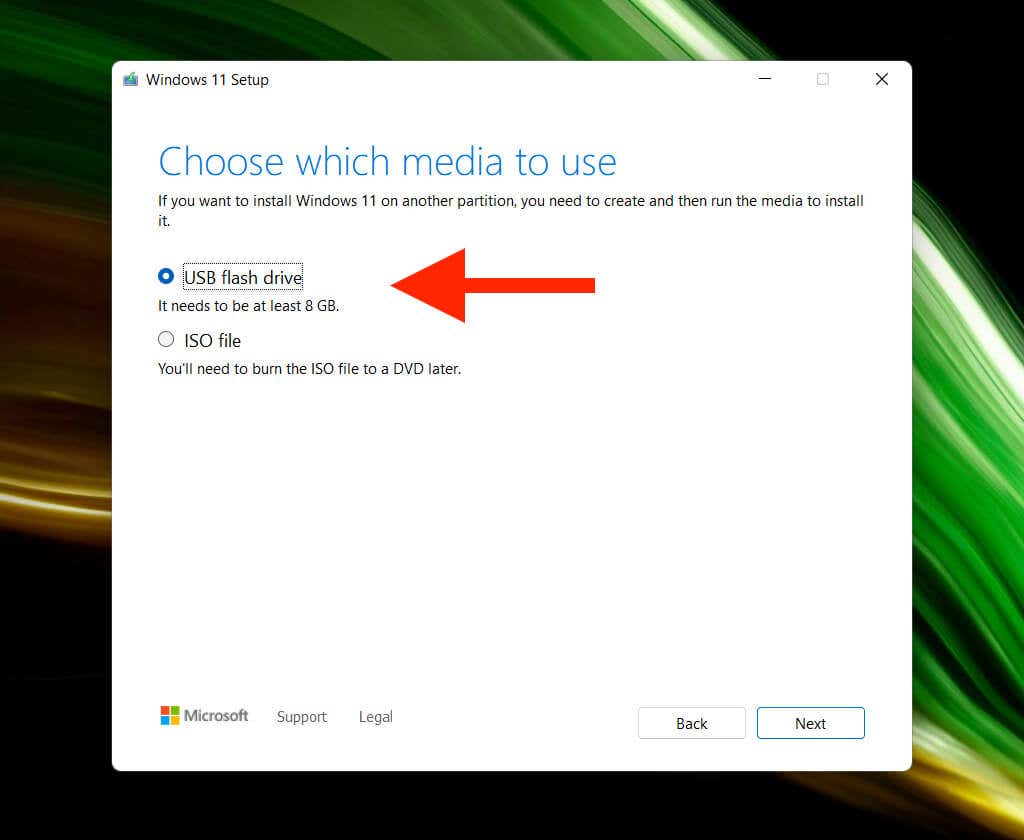
5. Connect the USB drive and select the radio button next to USB flash drive.
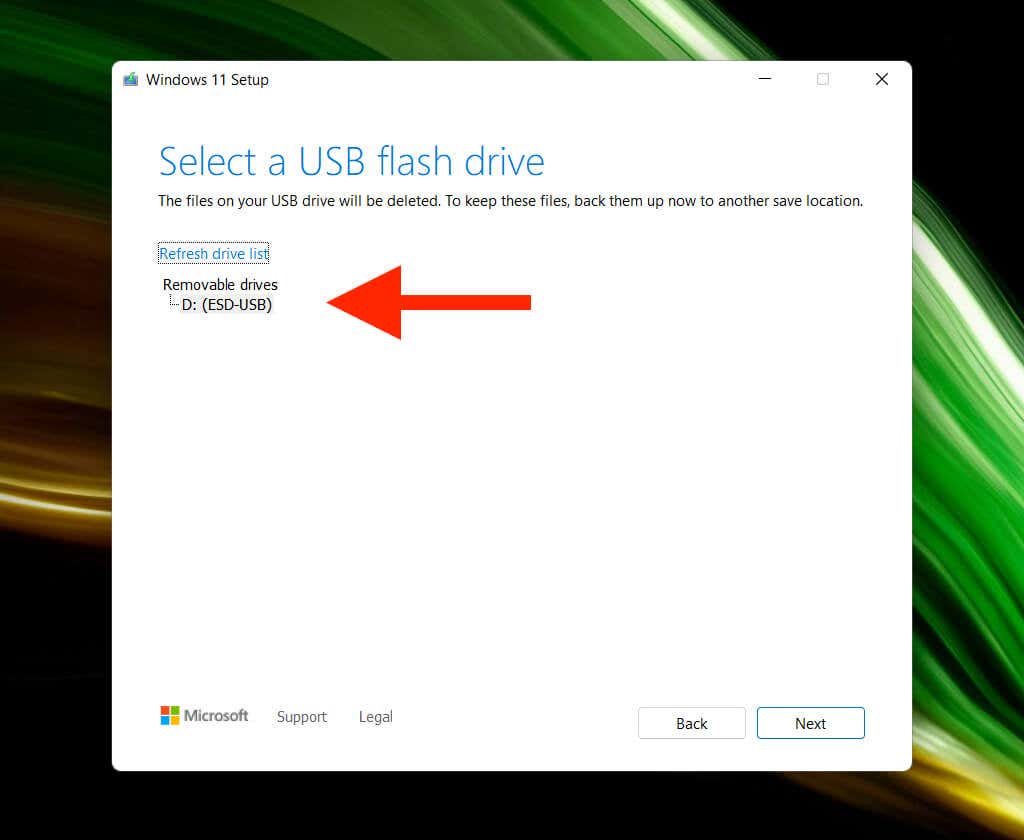
6. Select the correct USB flash drive from the list under Removable drives.
Warning: The Media Creation Tool will permanently wipe all data on the USB drive. If you haven’t already, back it up before selecting Next.
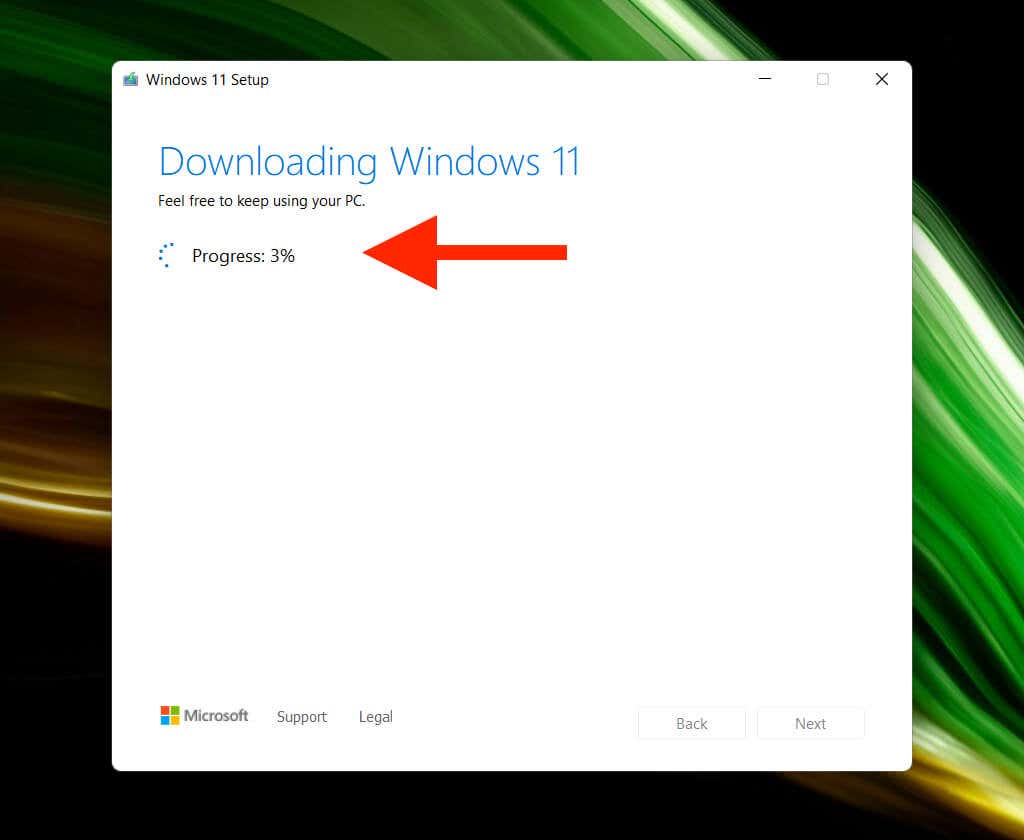
7. Wait for the Media Creation Tool to download and set up the USB drive. Depending on the internet connection speed, that may take up to an hour (or even more).
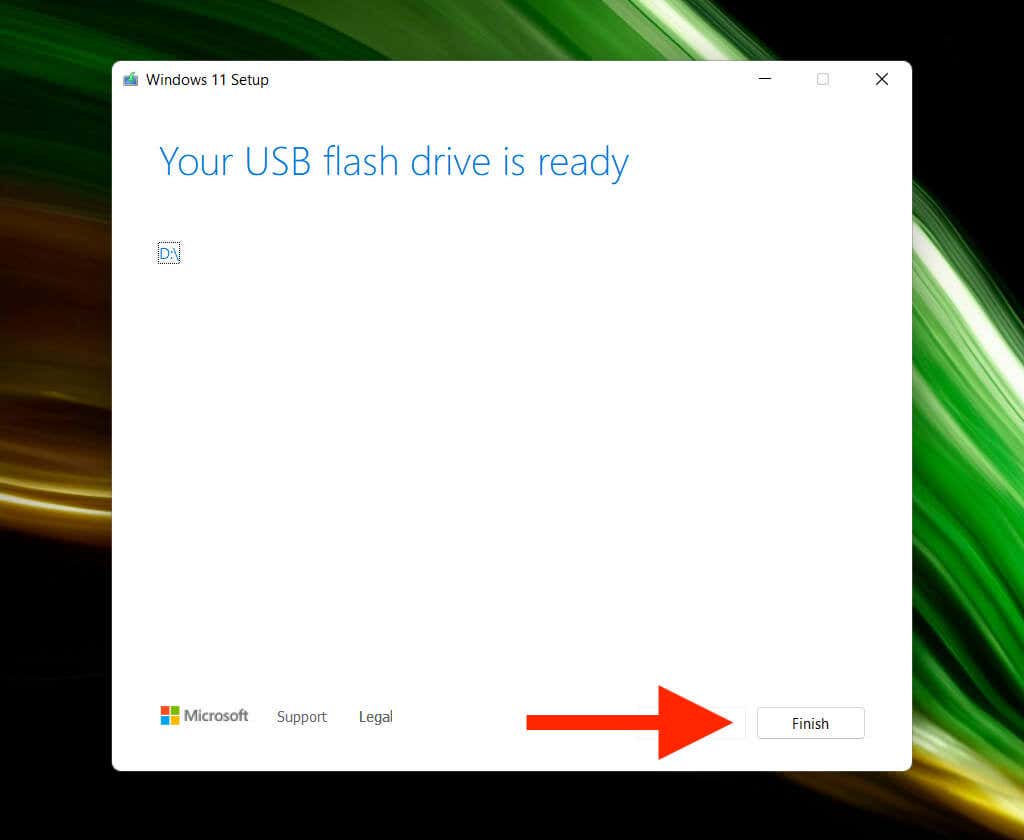
8. Select Finish. The USB drive is ready to install Windows 11. Disconnect it if you plan to install Windows 11 on a different PC.
How To Install Windows 11 Using a Bootable USB Drive
Windows 11 imposes stringent system requirements such as support for TPM (Trusted Platform Module) 2.0. So unless you plan on installing it onto a relatively recent desktop or laptop model, you must ensure that the PC is Windows 11-compatible by using Microsoft’s PC Health Check app.
Provided that your PC meets Windows 11’s system requirements, the trickiest part next involves accessing your PC’s Boot Manager. That consists in pressing the relevant key at computer startup, such as F2, F9, or F12. It’s best to check with the PC manufacturer for the exact key. For example, you can open the Boot Manager on Acer laptops by pressing F9.
Once you’ve invoked the Boot Manager, use the Up and Down arrow keys to select the USB drive, and press Enter to boot from it. If you have trouble accessing it, you must access the UEFI and change the boot order.
After booting from the USB drive, you should see the Windows 11 Setup screen. Go through the steps that follow to install Windows 11.
1. Specify your language, time and current format, and keyboard or input method and select Next.
2. Select Install now.
3. Enter your Windows product key and select Next. If you don’t have one or want to activate Windows 11 later, select I don’t have a product key.
4. Select the operating system version you want to install—e.g., Windows 11 Home or Windows 11 Pro. Make sure that it matches your Windows 11 license.
5. Accept Microsoft’s software license terms and select Next.
6. Select the option labeled Custom to clean install Windows 11. If you want to upgrade from a previous iteration of the operating system while keeping your data intact, select Upgrade instead.
7. Pick the drive or partition where you want to install Windows 11 and select Next. If you opt to perform a clean installation in the step above, you will lose all data on the drive or partition.
8. Wait until the Windows Setup copies and installs Windows 11 from the bootable USB drive.
Your PC will reboot automatically after the Windows Setup finishes installing Windows 11. You must then finish setting up the operating system on your PC.
Related: Having trouble completing an installation? Here’s how to troubleshoot a “Windows could not complete the installation” error and fix Windows installation error code 0x8007025d.
How To Finish Setting Up Windows 11 on Your PC
After installing Windows 11, you must work your way through several pages of options to finish setting up the operating system. These are self-explanatory and involve specifying the country or region, adjusting your privacy settings, configuring Windows Hello, and so on. Here’s a brief run-down of the most important.
Enter a Unique PC Name
If you want to connect to your computer from other devices, you must insert a unique name that you can quickly recognize. It can’t consist of numbers only or exceed 15 characters in length.
Sign In With Your Microsoft Account
Signing in with a Microsoft Account gives you the option to sync settings and preferences with Windows devices and signs you into stock apps such as Microsoft Edge and Skype. If your Windows license is linked to your Microsoft Account, signing in also helps with activation.
If you don’t want to sign in, you can opt for an offline account by selecting Sign-in options > Offline account.
Restore or Set Up As a New Device
If you signed in with a Microsoft Account, you get to decide if you want to restore any settings, preferences, and apps from your previous Windows installation. If not, make sure to select the Set up as new device option to set up your PC from scratch.

After you’ve finished setting up Windows 11, you may have to wait for a while longer until the Windows Setup completes installing any pending updates. You can then start using Windows 11 immediately.
If you’ve yet to activate Windows 11, don’t forget to get that sorted by heading over to Start > Settings > System > Activation.
Don’t Forget To Keep Windows 11 Up-to-Date
You’ve finished installing Windows 11 using the bootable USB drive you created. Congratulations! You must now make it a point to keep the operating system up-to-date. Go to Settings > Windows Update to manage Windows Update. That way, not only do you get the latest security fixes and performance upgrades, but you also prevent any known bugs or issues messing up your Windows 11 experience.


